|
Your Cart
|
|
Your cart is Empty
|
|
These are my instructions for installing my INTERNAL 1990 tach adapter into any 1991-1994 ECU.
1. The first step is to locate the two diodes that you need to remove, D108 and D116. They are located between IC110 (the big, vertical chip) and the green capacitors.
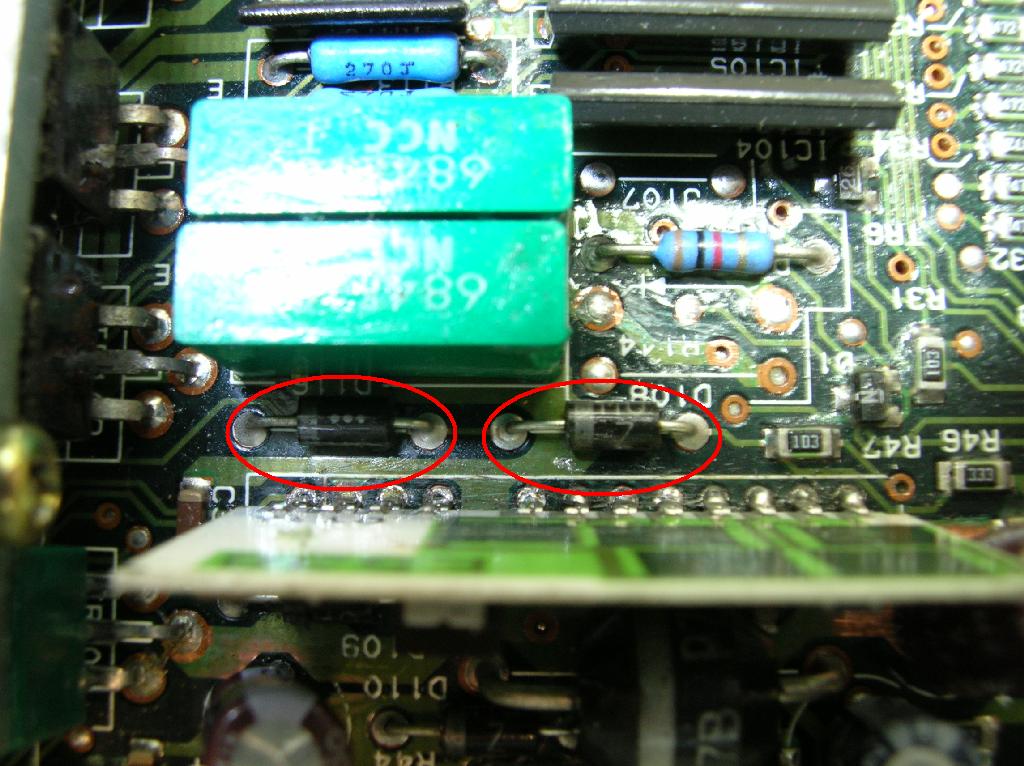
2. You should clean the conformal coating off the TOP AND BOTTOM of the board around the 4 diode pins, or it will make a mess when you try to solder later. Cut out both diodes, then use alcohol or acetone to remove the conformal coating.
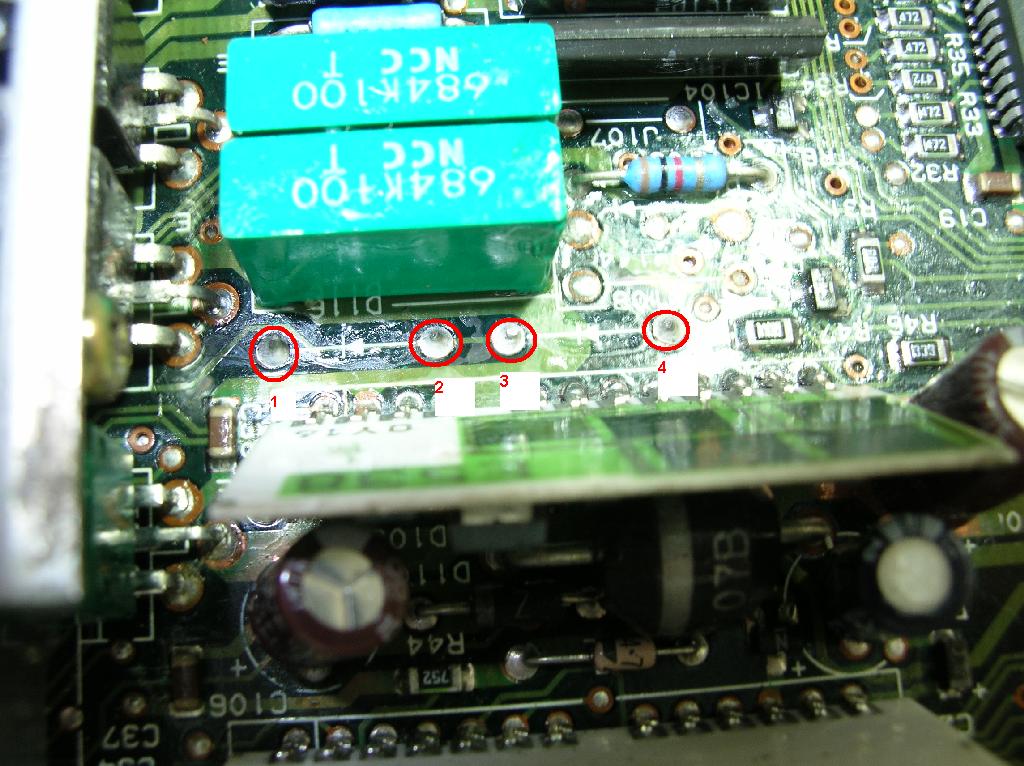
3. Use a solder-sucker or solderwick to remove the solder from three of the four holes, as pictured. I've numbered the holes 1-4, beginning back at the connector. The three that you need to clean out are #2, #3, and #4.

4. At this point you can insert the 2 leads of the tach adapter board into holes #2 and #4, with the component side of the adapter board facing IC110, as shown below. Why did I have you clean out #3, if you aren't going to use it? Well, I don't want the piece of diode lead sticking up to short to anything on the adapter board, OK?
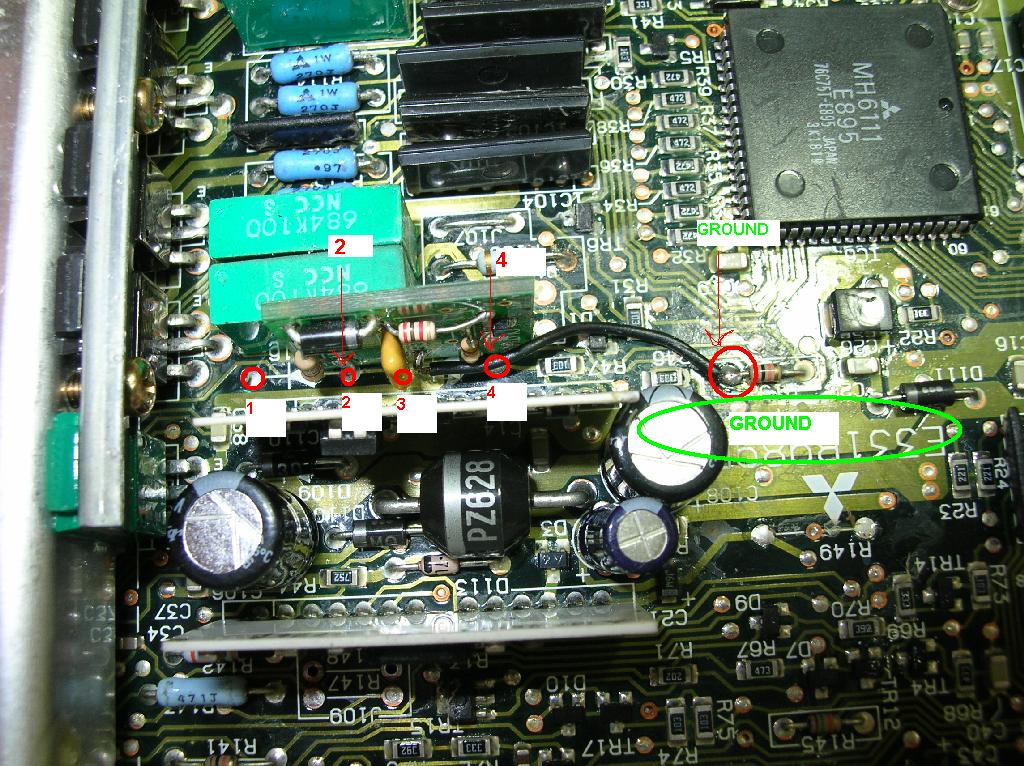
After you have inserted the 2 leads as deep as possible into the board, solder them in, and clip the leads underneath the board. The only thing left is to connect the black GROUND wire to a good ground. There are plenty of locations to choose from, as you will see. The power ground connects to the negative (-) side of each capacitor, and it is also connected to the left side of that resistor you see below in the picture. Wherever you decide to tack the GROUND wire, clean off the conformal coating to make a good connection.
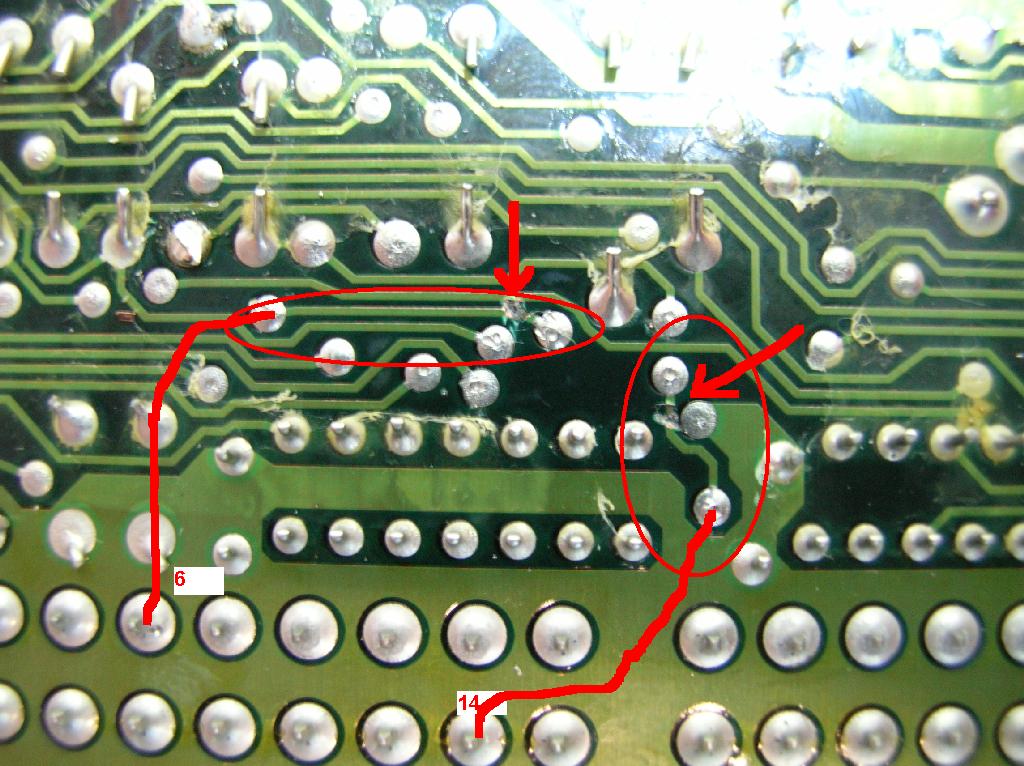
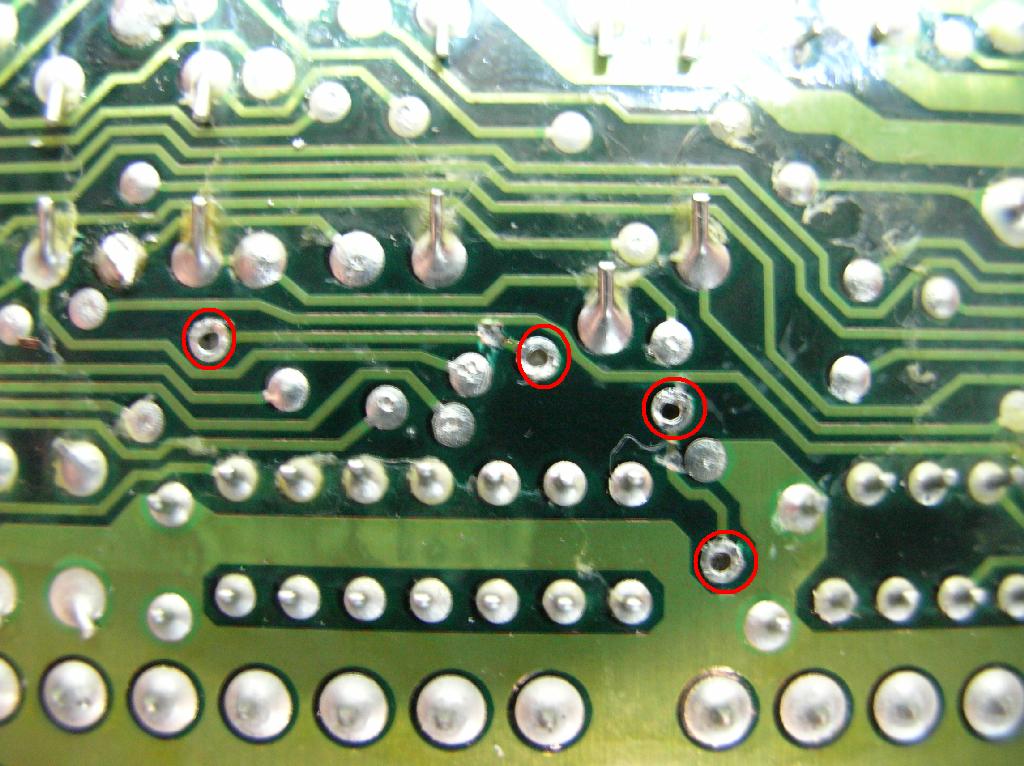
That's It! Now, if you want to REALLY complete the 1991+-to-1990 conversion, you can also swap pins 6 and 14 INSIDE the ECU, instead of swapping them in the harness. Here is a picture of the traces on this 1994 ECU I converted. Both traces are back near the connector for pins 1-24. You should ohm them out in your ECU, to make sure you are cutting the proper traces, as I have not compared every 1991-1994 Turbo ECU to see if they are the same. You simply need to nick or cut each trace completely through, so there is no longer any connection.
Again, I recommend cleaning everything with acetone, to make it easier to solder. Here's what it should look like after you also clean out the four holes on the traces:
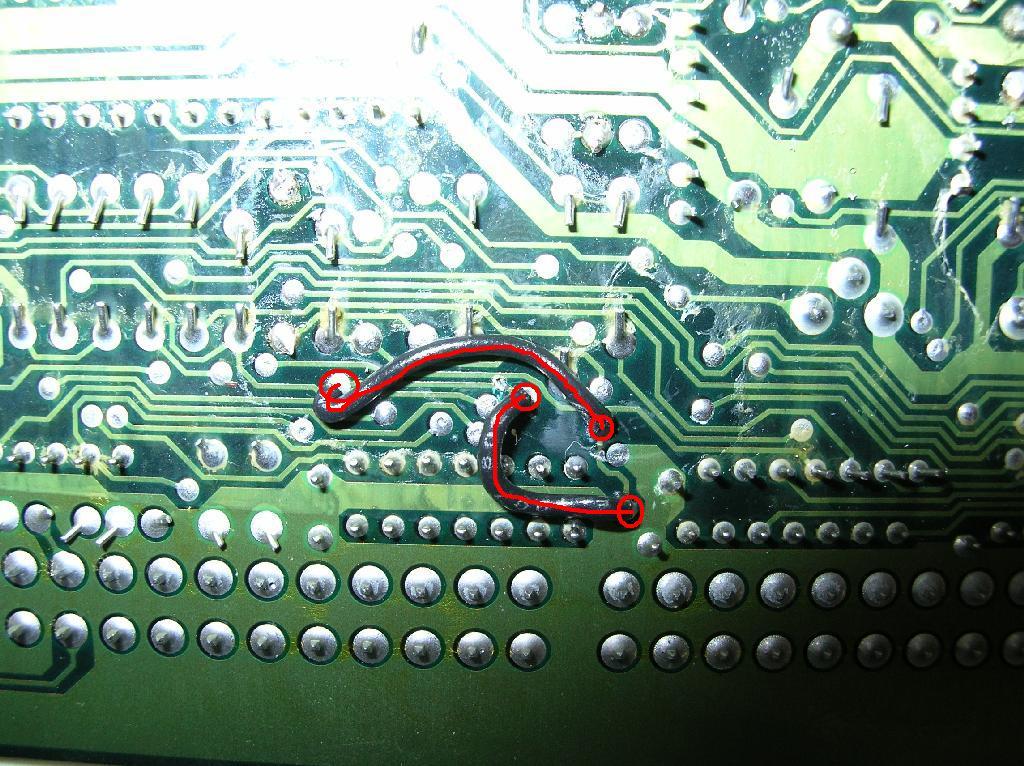
Finally, you need to simply cut two small jumper wires to crossconnect the two traces, as shown in the picture below. This will cause pin #6 to be connected to the circuitry formerly connected to pin #14, and pin #14 will be connected to the circuitry of pin #6, making it electrically identical to a 1990 ECU!
|
|
